


259
225
我的网盘,我做主
2018-05-21 21:47:12
25点赞
178收藏
24评论
家里一直想弄个 nas ,怎奈qiong【穷】,一直没弄成。在蛮早的时候就就接触过 seafile 这个软件了。趁着今天有时间,折腾折腾一下。
最想要的是文件同步的功能,就类似于360网盘那种直接挂载到本地,当本地盘用。用来做做文件的备份和不同PC间的文件共享,也希望可以修改后能实时同步。需求就是这么简单。
现在手上就一个旧的 16G 闪迪U盘,一张 16G 的 microSD 卡,一块 Raspberry Pi 2 板子。为了满足张大妈的需求,我还是贴上链接吧。

Micro SD 卡在淘宝或者京东自己搜一下吧,也就30~40左右。记得是class4的哦。
Raspberry Pi 2 板子 199元,也就自行淘宝吧,放上链接有推销的嫌疑。现在都出3了,可以买3试下。
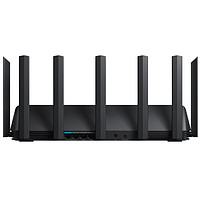
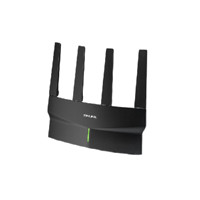
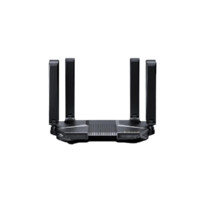
贴上我家的大怪兽,第一次搞这么“牛逼哄哄”的路由器,有点小激动。

好了进入今天的正题:
0. 需要有外网IP
需要有外网IP, 需要有外网IP, 需要有外网IP
重要的事情说三遍。你可以去 这个网站 看下IP 和自己路由器里面拨号的IP是否一致。如果一致,则说明是 外网IP。
安装 Raspbian GNU/Linux 9.4 (stretch) 系统;
此处省略1万字,自行谷歌好了。
2. 需要 DDNS
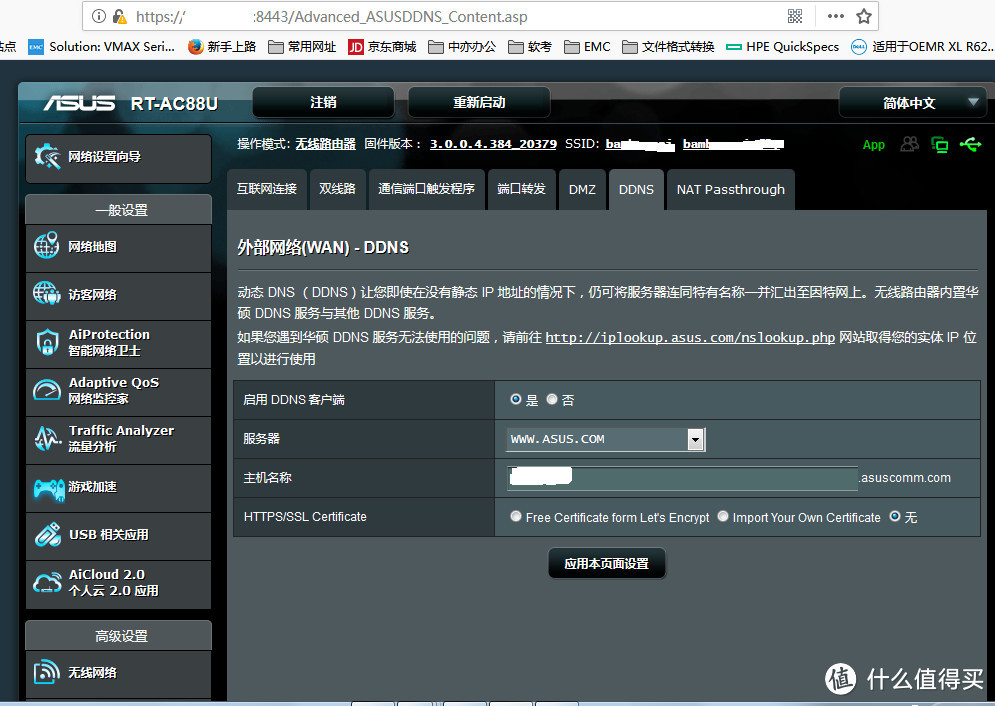
因为前不久才入手的一台 ASUS AC88U “大怪兽”,所有 DDNS 自然用的是华硕自己的。请看图,原谅我懒,AC88U 懒得嗮图了。就只贴下DDNS的设置吧。
备注:
在“外部网络”→“DDNS”菜单栏中,将“启用DDNS客户端”选择“是”,然后主机名称自己填,例如:"example",完整的地址就是:example.asuscomm.com。"example" 字样可以换成你喜欢的任何英文字符。
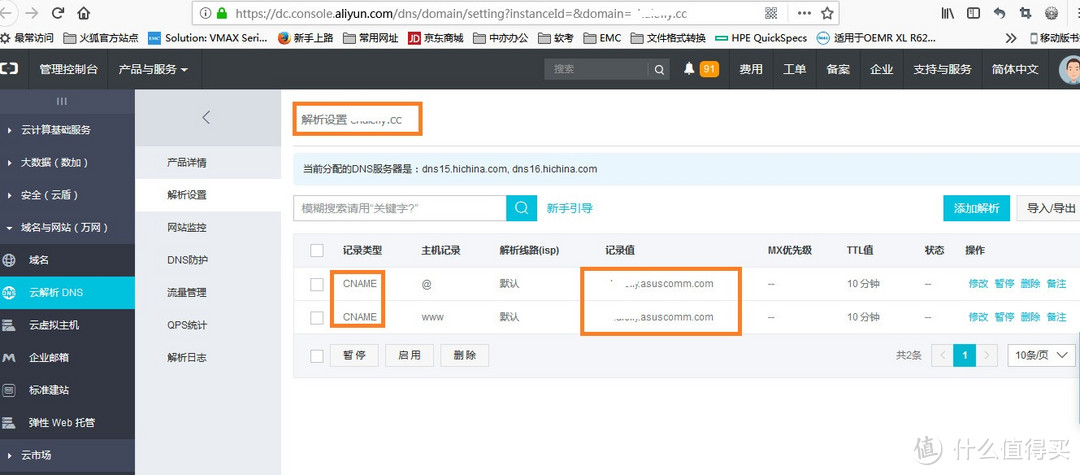
3. 购买域名
我是在阿里云的万网里面注册的两个域名,然后在域名中添加一条CNAME 记录,指向 example.asuscomm.com 这个域名。如下图所示:
4. 将U盘插上去
新建一个 /mnt/usb 目录
用命令 fdisk -l 查看那个是 U盘,我们这边是 /dev/sda4:
大致看下容量,然后确定是 /dev/sda,然后我们在 fdsik -l /dev/sda 看下具体信息
$ sudo fdisk -l |grep ^Disk
... ...
Disk /dev/mmcblk0: 14.9 GiB, 15931539456 bytes, 31116288 sectors
Disklabel type: dos
Disk identifier: 0x1d363ad8
Disk /dev/sda: 11.4 GiB, 12213813248 bytes, 23855104 sectors
Disklabel type: dos
Disk identifier: 0xcad4ebea
$ sudo fdisk -l /dev/sda
Disk /dev/sda: 11.4 GiB, 12213813248 bytes, 23855104 sectors
Units: sectors of 1 * 512 = 512 bytes
Sector size (logical/physical): 512 bytes / 512 bytes
I/O size (minimum/optimal): 512 bytes / 512 bytes
Disklabel type: dos
Disk identifier: 0xcad4ebea
Device Boot Start End Sectors Size Id Type
/dev/sda4 * 63 23855103 23855041 11.4G c W95 FAT32 (LBA)
将U盘挂载信息写入 fstab文件中,以实现开机自动挂载:
$ sudo echo "/dev/sda4 /mnt/usb vfat defaults 0 0"
$ mount -a
$ df -h /mnt/usb/
Filesystem Size Used Avail Use% Mounted on
/dev/sda4 12G 5.8G 5.7G 51% /mnt/usb
U盘到此就配置完成了。
5. 下载并配置Seafile
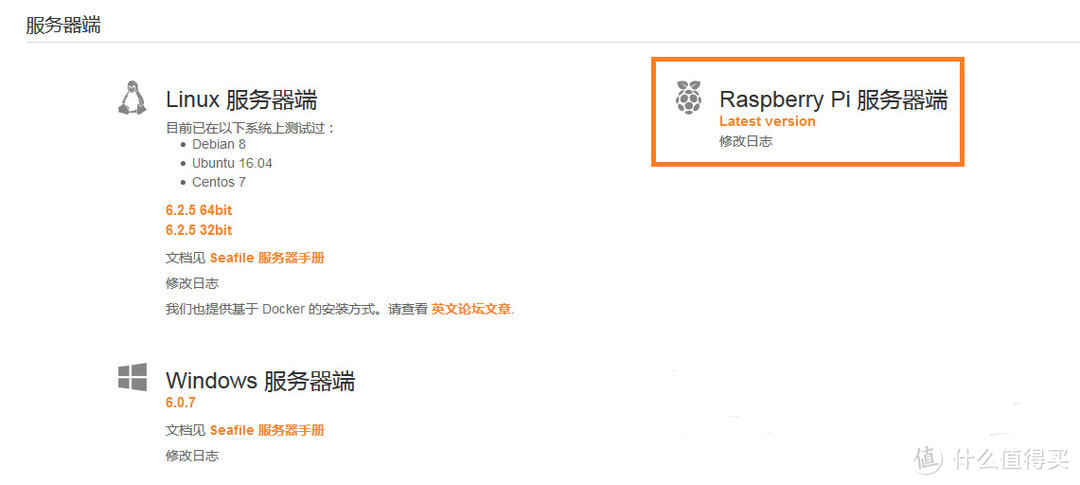
下载 Raspberry Pi 服务器端软件包。
知道你们是老手老司机,但也不要怪我多嘴。我还是大致说下步骤吧。
1). 更新系统;
$ sudo apt-get update
$ sudo apt-get upgrade
2). 安装必须的依赖软件:
$ sudo apt-get install python2.7 libpython2.7 python-setuptools python-imaging
python-ldap python-mysqldb python-memcache python-urllib3 sqlite3
3). 安装 MariaDB 数据库(非必须)
此处省略1万字,自行谷歌好了。
4). 新建一个目录,我计划是将安装文件放在 /usr/local/seafile 目录下,tar.gz 压缩包放在 installed 目录下
$ sudo mkdir -p /usr/local/seafile/installed
$ sudo cp seafile-server_6.2.5_stable_pi.tar.gz /usr/local/seafile/installed
5). 解压文件,并查看下目录结构树
$ sudo tar -zxvf seafile-server_6.2.5_stable_pi.tar.gz -C /usr/local/seafile/
$ tree -L 2 /usr/local/seafile
/usr/local/seafile/
├── installed
│ └── seafile-server_6.2.5_stable_pi.tar.gz
└── seafile-server-6.2.5
├── check_init_admin.py
├── reset-admin.sh
├── runtime
├── seaf-fsck.sh
├── seaf-fuse.sh
├── seaf-gc.sh
├── seafile
├── seafile.sh
├── seahub
├── seahub.sh
├── setup-seafile-mysql.py
├── setup-seafile-mysql.sh
├── setup-seafile.sh
└── upgrade
6-1). 加入安装了 MariaDB 数据库,配置如下:
$ sudo /usr/local/seafile/seafile-server-6.2.5/setup-seafile-mysql.sh
Checking python on this machine ...
Checking python module: setuptools ... Done.
Checking python module: python-imaging ... Done.
Checking python module: python-mysqldb ... Done.
-----------------------------------------------------------------
This script will guide you to setup your seafile server using MySQL.
Make sure you have read seafile server manual at
https://github.com/haiwen/seafile/wiki
Press ENTER to continue
-----------------------------------------------------------------
What is the name of the server? It will be displayed on the client.
3 - 15 letters or digits
[ server name ] expleam (随便填,你的服务器名字)
What is the ip or domain of the server?
For example: www.mycompany.com, 192.168.1.101
[ This server's ip or domain ] expleam.cc (万网注册的域名,你也可以填你在华硕 DDNS 里面注册的二级域名,也可以选择花生壳的免费二级域名)
Where do you want to put your seafile data?
Please use a volume with enough free space
[ default "/usr/local/seafile/seafile-data" ] /mnt/usb/seafiledata
/mnt/usb/seafiledata already exists
Where do you want to put your seafile data?
Please use a volume with enough free space
[ default "/usr/local/seafile/seafile-data" ] /mnt/usb/seafiledata
Which port do you want to use for the seafile fileserver?
[ default "8082" ] 8082 (千万要默认,不要改,否则后期会有很多问题的。多么痛的领悟)
-------------------------------------------------------
Please choose a way to initialize seafile databases:
-------------------------------------------------------
[1] Create new ccnet/seafile/seahub databases
[2] Use existing ccnet/seafile/seahub databases
[ 1 or 2 ] 1
What is the host of mysql server?
[ default "localhost" ]
What is the port of mysql server?
[ default "3306" ]
What is the password of the mysql root user?
[ root password ]
verifying password of user root ... done
Enter the name for mysql user of seafile. It would be created if not exists.
[ default "seafile" ]
Enter the password for mysql user "seafile":
[ password for seafile ]
Enter the database name for ccnet-server:
[ default "ccnet-db" ] seafile-ccnet-db
Enter the database name for seafile-server:
[ default "seafile-db" ] seafile-server-db
Enter the database name for seahub:
[ default "seahub-db" ] seafile-seahub-db
---------------------------------
This is your configuration
---------------------------------
server name: expleam
server ip/domain: expleam.cc (我填的是在万网注册的域名)
seafile data dir: /mnt/usb/seafiledata
fileserver port: 8012
database: create new
ccnet database: seafile-ccnet-db
seafile database: seafile-server-db
seahub database: seafile-seahub-db
database user: seafile
---------------------------------
Press ENTER to continue, or Ctrl-C to abort
---------------------------------
Generating ccnet configuration ...
done
Successly create configuration dir /usr/local/seafile/ccnet.
Generating seafile configuration ...
Done.
done
Generating seahub configuration ...
----------------------------------------
Now creating seahub database tables ...
----------------------------------------
creating seafile-server-latest symbolic link ... done
-----------------------------------------------------------------
Your seafile server configuration has been finished successfully.
-----------------------------------------------------------------
run seafile server: ./seafile.sh { start | stop | restart }
run seahub server: ./seahub.sh { start | stop | restart }
-----------------------------------------------------------------
If you are behind a firewall, remember to allow input/output of these tcp ports:
-----------------------------------------------------------------
port of seafile fileserver: 8082
port of seahub: 8000
When problems occur, Refer to
https://github.com/haiwen/seafile/wiki
for information.
6-2). 如果没有配置Mariadb,默认会用 sqlite
$ sudo /usr/local/seafile/seafile-server-6.2.5/setup-seafile.sh
-----------------------------------------------------------------
This script will guide you to config and setup your seafile server.
Make sure you have read seafile server manual at
https://github.com/haiwen/seafile/wiki
Note: This script will guide your to setup seafile server using sqlite3,
which may have problems if your disk is on a NFS/CIFS/USB.
In these cases, we sugguest you setup seafile server using MySQL.
Press [ENTER] to continue
-----------------------------------------------------------------
Checking packages needed by seafile ...
Checking python on this machine ...
Find python: python2.7
Checking python module: setuptools ... Done.
Checking python module: python-imaging ... Done.
Checking python module: python-sqlite3 ... Done.
Checking for sqlite3 ...Done.
Checking Done.
What would you like to use as the name of this seafile server?
Your seafile users will be able to see the name in their seafile client.
You can use a-z, A-Z, 0-9, _ and -, and the length should be 3 ~ 15
[server name]: example
What is the ip or domain of this server?
For example, www.mycompany.com, or, 192.168.1.101
[This server's ip or domain]: expleam.cc (万网申请的域名,也可以是asus或者花生壳的二级域名,只要能解析就行)
Where would you like to store your seafile data?
Note: Please use a volume with enough free space.
[default: /usr/local/seafile/seafile-data ] /mnt/usb/Seafile
What tcp port do you want to use for seafile fileserver?
8082 is the recommended port.
[default: 8082 ] 8082
This is your config information:
server name: example
server ip/domain: expleam.cc
seafile data dir: /mnt/usb/Seafile
fileserver port: 8082
If you are OK with the configuration, press [ENTER] to continue.
Generating ccnet configuration in /usr/local/seafile/ccnet...
done
Successly create configuration dir /usr/local/seafile/ccnet.
Generating seafile configuration in /mnt/usb/Seafile ...
Done.
-----------------------------------------------------------------
Seahub is the web interface for seafile server.
Now let's setup seahub configuration. Press [ENTER] to continue
-----------------------------------------------------------------
Creating seahub database now, it may take one minute, please wait...
Done.
creating seafile-server-latest symbolic link ... done
-----------------------------------------------------------------
Your seafile server configuration has been completed successfully.
-----------------------------------------------------------------
run seafile server: ./seafile.sh { start | stop | restart }
run seahub server: ./seahub.sh { start | stop | restart }
-----------------------------------------------------------------
If the server is behind a firewall, remember to open these tcp ports:
-----------------------------------------------------------------
port of seafile fileserver: 8082
port of seahub: 8000
When problems occur, refer to
https://github.com/haiwen/seafile/wiki
for more information.
7). 安装配置 nginx
$ sudo apt-get install nginx
增加 seafile.conf 的 nginx 控制配置文件
$ sudo vi /etc/nginx/sites-available/seafile.conf
server {
listen 80;
server_name expleam.cc;
proxy_set_header X-Forwarded-For $remote_addr;
location / {
proxy_pass http://127.0.0.1:8000;
proxy_set_header Host $host;
proxy_set_header X-Real-IP $remote_addr;
proxy_set_header X-Forwarded-For $proxy_add_x_forwarded_for;
proxy_set_header X-Forwarded-Host $server_name;
proxy_read_timeout 1200s;
# used for view/edit office file via Office Online Server
client_max_body_size 0;
access_log /var/log/nginx/seahub.access.log;
error_log /var/log/nginx/seahub.error.log;
}
# If you are using [FastCGI](http://en.wikipedia.org/wiki/FastCGI),
# which is not recommended, you should use the following config for location `/`.
#
# location / {
# fastcgi_pass 127.0.0.1:8000;
# fastcgi_param SCRIPT_FILENAME $document_root$fastcgi_script_name;
# fastcgi_param PATH_INFO $fastcgi_script_name;
#
# fastcgi_param SERVER_PROTOCOL $server_protocol;
# fastcgi_param QUERY_STRING $query_string;
# fastcgi_param REQUEST_METHOD $request_method;
# fastcgi_param CONTENT_TYPE $content_type;
# fastcgi_param CONTENT_LENGTH $content_length;
# fastcgi_param SERVER_ADDR $server_addr;
# fastcgi_param SERVER_PORT $server_port;
# fastcgi_param SERVER_NAME $server_name;
# fastcgi_param REMOTE_ADDR $remote_addr;
# fastcgi_read_timeout 36000;
#
# client_max_body_size 0;
#
# access_log /var/log/nginx/seahub.access.log;
# error_log /var/log/nginx/seahub.error.log;
# }
location /seafhttp {
rewrite ^/seafhttp(.*)$ $1 break;
proxy_pass http://127.0.0.1:8082;
client_max_body_size 0;
proxy_set_header X-Forwarded-For $proxy_add_x_forwarded_for;
proxy_connect_timeout 36000s;
proxy_read_timeout 36000s;
proxy_send_timeout 36000s;
proxy_request_buffering off;
send_timeout 36000s;
}
location /media {
root /usr/local/seafile/seafile-server-latest/seahub;
}
}
8). 启动 seafile 和 seahub
$ sudo /usr/local/seafile/seafile-server-6.2.5/seafile.sh start
第一次启动 seahub 时会要求你设置一个admin账号,显示如下:
$ sudo /usr/local/seafile/seafile-server-6.2.5/seahub.sh start
Starting seahub at port 8000 ...
----------------------------------------
It's the first time you start the seafile server. Now let's create the admin account
----------------------------------------
What is the email for the admin account?
[ admin email ] expleam@163.com admin 账号设置
What is the password for the admin account?
[ admin password ]
Enter the password again:
[ admin password again ]
----------------------------------------
Successfully created seafile admin
----------------------------------------
Seahub is started
Done.
查看端口监听是否正常
$ netstat -tlunp |egrep "8082|8000"
(Not all processes could be identified, non-owned process info
will not be shown, you would have to be root to see it all.)
tcp 0 0 0.0.0.0:8082 0.0.0.0:* LISTEN -
tcp 0 0 0.0.0.0:8000 0.0.0.0:* LISTEN -
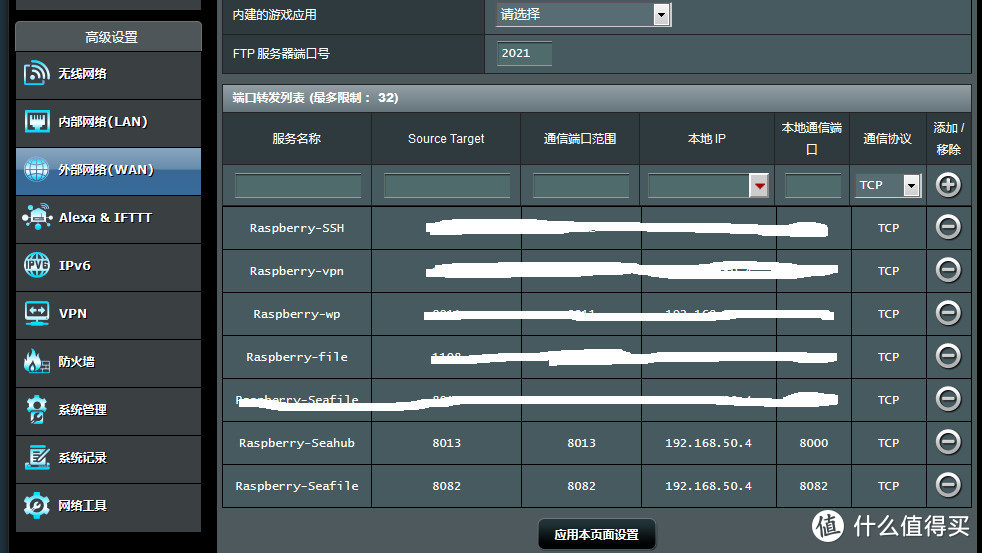
9). 路由器设置端口映射,如下图所示:
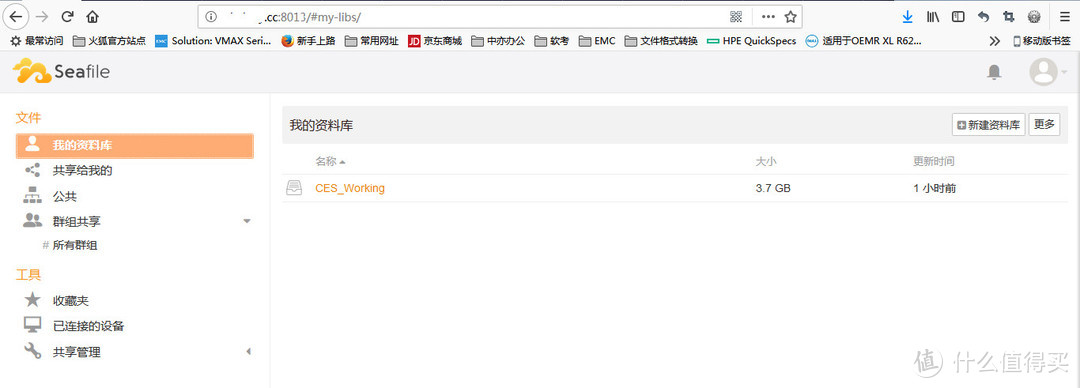
10). 网络登录上去查看,完全没问题
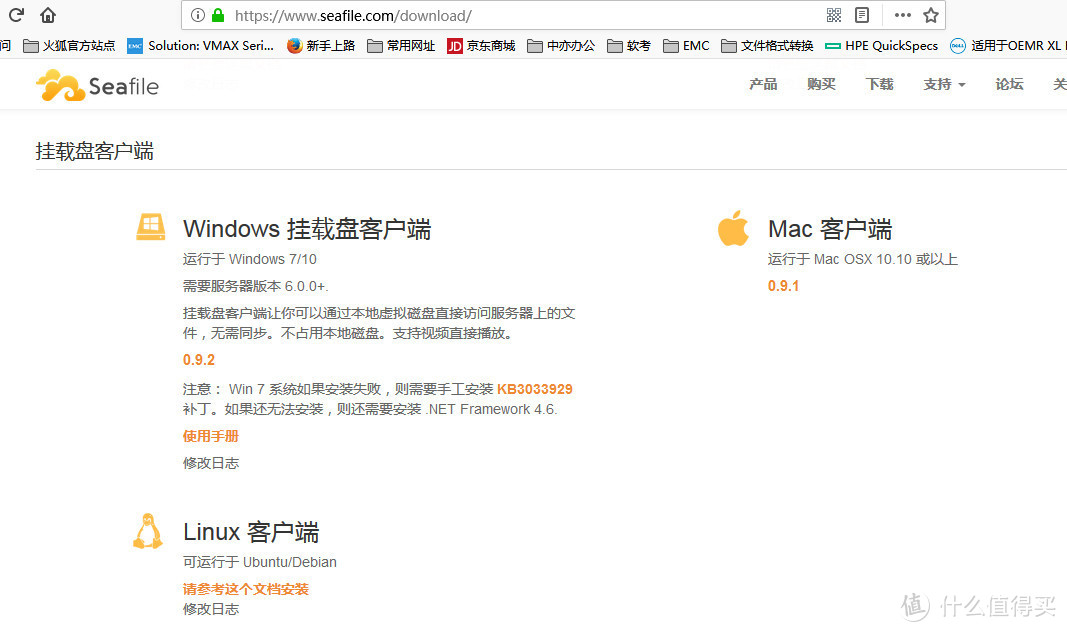
10). 下载安装Windows挂载版的软件
11). 软件安装完成后,会在我的电脑里面多出一个S盘
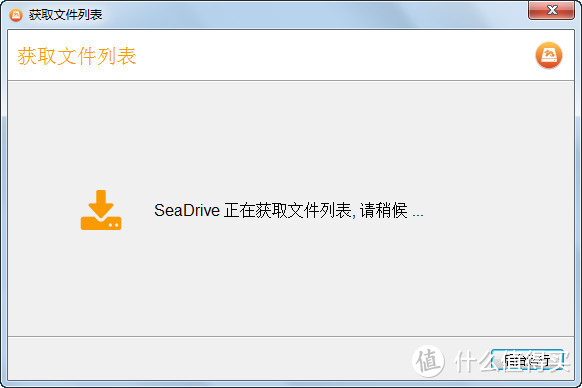
我们先用之前初始化的账号登录下,如下图所示:

登录完成后,会先获取文件列表
然后我们可以看到多了个 S盘
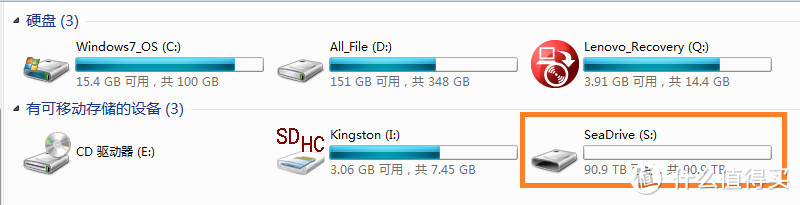
发现没有,可用空间 90.9TB,牛逼的很。不过这只是假象,千万别信。这逼装的到位不。
然后我这本身就已经有文件了,状态如下:
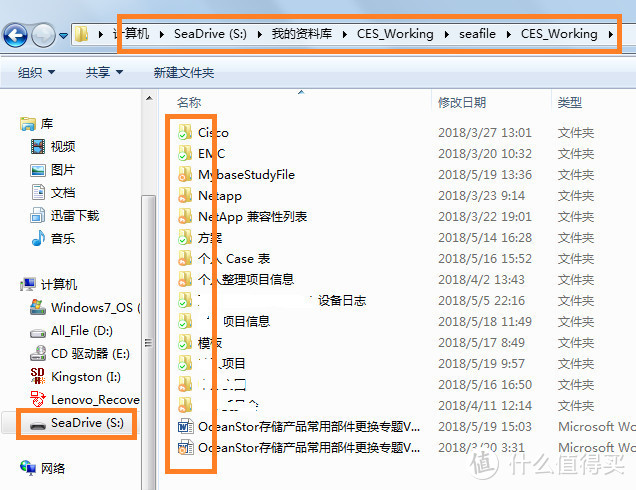
跟自己本地的盘一样的用,可以双击直接点开文档。
总结:
屌丝版实时文件同步。如果有钱,真心可以搞个专门的 Nas,我这只是因为工作数据比较重要,备了4份。
1份在本地硬盘,1份在SD卡上,1份在移动硬盘里面,1份就在这seafile服务器上。
经常换电脑,或者说笔记本和台式机上无缝实时拷贝,或者说修改文档,那是相当的好用。
花费总共:二级域名不用钱 + Micro SD + U盘 + Raspberry Pi 2 = 0 + 35 + 40 + 199 = 274
像我这样装个比,买个*级域名也就 15一年,原谅我qiong只买的起 .cc 结尾的。总工 274 就能搭建一个实时共享使用起来像本地硬盘的网络共享存储。那是相当的值啊。这个软件支持 MAC ,安卓,IOS,Window,Linux,ARM 几乎全平台适用。强大的一逼。喜欢动手的可以搞搞。下次自己租个 Nas ,装个 Linux 在慢慢折腾一下更牛逼的 Nas 好了。
我们的宗旨是:花小钱,办大事。我是“美国短跑名将”琼斯。
谢谢各位听我在这吹了这么久的水,灰常感谢。


黄焖鸡米饭
校验提示文案
wjswift
校验提示文案
zzbaobei
校验提示文案
贼酱的小迷妹
校验提示文案
muye
校验提示文案
盗帽暗燃
校验提示文案
xia_tian1225
校验提示文案
qianp
校验提示文案
ggex3
校验提示文案
lustlost
校验提示文案
飞翔的小鸟
校验提示文案
飞翔的小鸟
校验提示文案
lustlost
校验提示文案
盗帽暗燃
校验提示文案
wjswift
校验提示文案
muye
校验提示文案
ggex3
校验提示文案
贼酱的小迷妹
校验提示文案
xia_tian1225
校验提示文案
qianp
校验提示文案
zzbaobei
校验提示文案
黄焖鸡米饭
校验提示文案